How to limb a tree
Simple and effective limbing requires good technique. If you are a beginner, you can start slowly and methodically, and then gradually increase your speed. Here are some basic rules and methods for safe and efficient limbing.
Limbing is the operation that usually takes the most time and effort when working with chainsaws. Therefore, you have much to gain by learning an effort saving and quick limbing method. If you get tired in your back from limbing a tree, this may well be an indication that your technique needs fine tuning.
Overview
Safe and comfortable operating position
To achieve a safe and comfortable operating position – make sure to understand and learn these considerations:

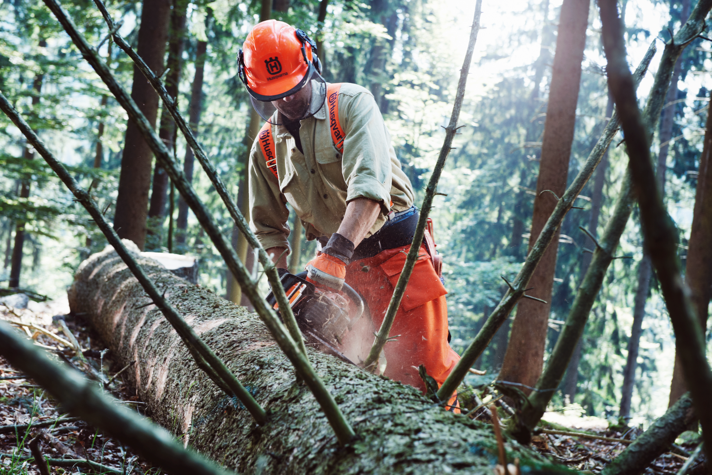
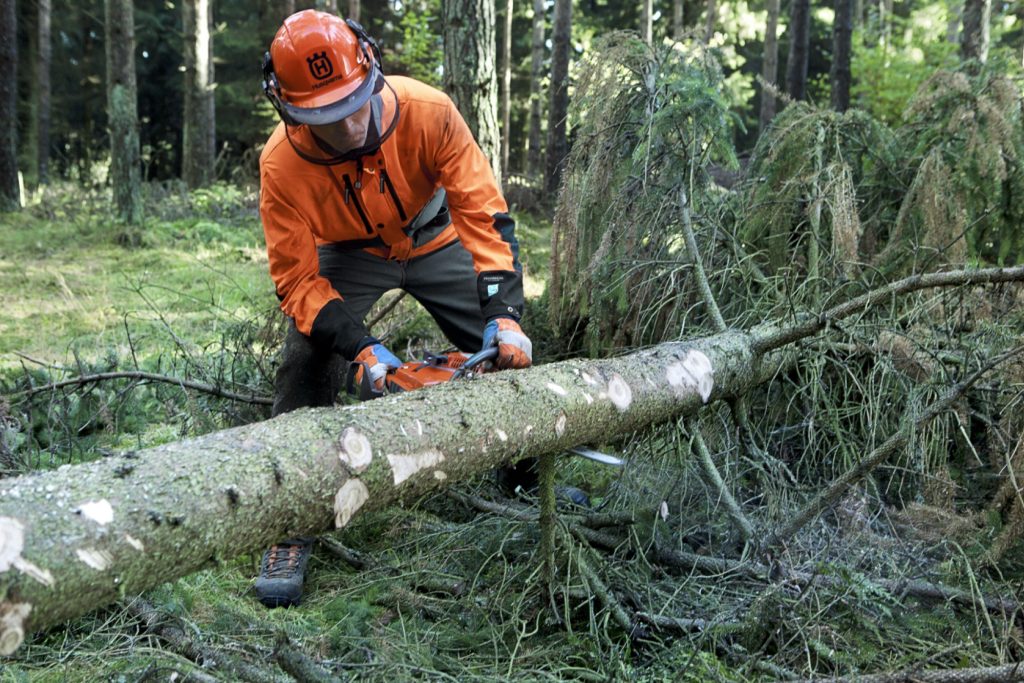
SAFE WORKING POSITION Always stand on the left side of the tree trunk and always limb from the roots to the top end. Stand securely with your feet apart at a 45 degree angle to the trunk. Work with the saw near your body. It is important that your stance is stable in two directions. It is always dangerous to move your feet while limbing. That is why it is important to have ample reach without needing to move your feet.
COMFORTABLE WORKING HEIGHT Try to work at a height at which you do not have to stoop down. You can achieve the right working height by trying to fell a tree so that it falls over the other felled trees, logs, stones or elevations in the terrain. The most comfortable working height you can achieve when limbing can be at waist height down to knee level. Bend your knees, not your back!
BALANCE THE CHAINSAW ON THE TRUNK OR YOUR LEG Carry the saw as little as possible while limbing and changing positions. The chainsaw must not be lifted away from the trunk more than necessary. Use the chainsaw as a lever, with the saw body resting on the trunk or your leg. Limbing will be easier and more effective with a short guide bar (13″–15″).
SAFE MOVEMENT Always hold the guide bar on the other side of the trunk when you move your feet. The chain must be stationary when you move. Hold the saw by both handles when moving short distances, never by the rear handle only. For longer movements, you should activate the chain brake and carry the saw by the front handle.
CONSIDER THE WEIGHT OF THE BRANCH Determine how the branches are tensioned. Cut on the opposite side of the branch where the guide bar is not likely to “pinch” because of the weight of the branch. If you are not sure you cut the branch in stages, from the outside in towards the trunk.
BEWARE OF KICKBACKS Avoid cutting with the guide bar tip. Your thumbs and fingers must always be wrapped around the handles during limbing work. Use a guide bar length that is adapted to the dimension of the tree.
REMOVE ANY BRANCHES THAT ARE IN THE WAY Let the saw rest on the trunk while lifting off severed limbs or branches with your right hand. Activate the chain brake.
About limbing with the lever method

This method is suitable for trees with thin to medium thick branches and regular rounds of branches. For example, if a thick hanging branch is likely to jam the chain and the guide bar, you may need to deviate from the recommended direction of cut on the branches.
This method is based on using the saw as a lever with the saw body resting as much as possible against the trunk or your leg. The working pattern is to cut each branch in a certain order, which is based on the principle that you should lift the saw as little as possible from the tree trunk.
Limbing will be easier and more effective using a short guide bar (13″–15″).
Basic sequence, step 1-3 The basic sequence is to limb the trunk on the right side (step 1), top (step 2) and left side (step 3) from the position you are standing. Now move forward to the next round of branches. Place the saw on the right side of the trunk and let the saw slide along the trunk.
Advanced sequence, step 1-6 Once you have mastered the basic sequence, you might want to use the advanced sequence which adds a smoother flow to your work for greater efficiency. The advanced sequence basically adds three steps (steps 4-6) to the basic sequence.

Method
The lever method
Stand on the left side of the trunk and begin limbing on the right side of the trunk. Work calmly and methodically, branch by branch. The branches can be sawn with a pulling or pushing chain depending on the direction you apply the guide bar and how much the branch weighs.
Here’s how to do it step by step.
1. Limbing the right side
2. Limbing the top side
3. Limbing the left side
4. Continue forward on the left side
5. Limbing the top side again
6. Limbing the right side again
7. Move to a new starting position
1. Limbing the right side

• Let the saw rest against the trunk.
• Saw with a pushing chain.
• Your centre of gravity should be on your right leg.
• Support your right leg against the trunk for extra balance.
2. Limbing the top side

• Rest the guide bar on the trunk.
• Saw with a pushing chain.
• Your centre of gravity should be on your left leg.
• Place your right leg against the saw body.
3. Limbing the left side

• Relieve the weight of the saw against the trunk and your right leg.
• Saw with a pulling chain.
• Your centre of gravity should be on your left leg.
As you can see, the basic sequence, with its three steps, is rather straightforward. For greater efficiency, take a look at the advanced sequence which adds three steps for a smoother flow in your limbing work.
4. Continue forward on the left side

• Rest the saw against the trunk and your leg.
• Saw with a pushing chain. For thick branches you can also use a pulling chain.
5. Limbing the top side again

• Rest the saw against the trunk.
• Saw with a pushing chain.
• Adjust the throttle with your thumb.
• Divide your weight over both legs.
6. Limbing the right side again

• Rest the saw against the trunk.
• Saw with a pulling chain.
• Your centre of gravity should be on your right leg.
• Restart from the next step 1.
7. Move to a new starting position
Place the bar on the right side of the trunk. Let the saw slide along the trunk as you move forward to the next round of branches.
Limbing the downward face
With the trunk directly on the ground
When you have limbed the whole trunk on the right, left and top, turn the whole trunk allowing you to access the branches underneath. If necessary, you can cut the trunk to suitable lengths before you turn it.

At a suitable working height
If you have a good working height that allows you access to the branches under the trunk, you can limb the downward face while you are performing the normal limbing process. Normally, it will be enough to limb the downward face after about two rounds of branches. Move your right foot a little bit and turn to face the trunk. Support the saw by resting your arms on your knees/thighs.
Limbing thick branches
A different work technique is used for limbing thick branches than that used for thin branches. This applies to leaf trees and other trees with thick, extensive branches. The working technique often matches the technique used for crosscutting. In order to avoid splitting and the guide bar pinching, it is important that you use the correct technique and sequence.
How are the branches tensioned? Be aware how the tree and branches move as you saw.
Gradual reduction of the tension in the branch.
1. Make a few cuts, about one-third of the branch diameter of the inside of the bow.
2. Cut gently from the outside of the bow until the branch breaks.

Crosscutting rough branches without splitting.
1. Make a cut on the underside of the branch, up to half the branch diameter a little bit from the trunk.
2. The next cut is sawn on the branch’s top side, a few centimetres beyond the first cut, up to half the branch diameter.
3. The branch will break between the cuts along the wood fibres.
Soft breaking of a tensioned branch
1. Hold the chainsaw, as shown in the image. Saw a bit into the guide bar so that you do not risk coming close to the kickback zone on the guide bar tip.
2. Saw carefully, in stages, a diagonal cut on the outside of the bow until the branch breaks.
