How to remove a hang-up tree
If you accidentally fell a tree into another – always start by taking a break and thinking through the situation calmly. Removing a trapped tree is always a hazardous undertaking and there is no need to rush. Choose the safest solution to the problem even if it takes longer. There are several options. Do not be afraid to call for help – your safety is more important than anything else.
Below are two methods that you can use to easily bring down a hung-up tree – as long as it is not too big or too entangled in the second tree. But first let’s take a quick look at recommended tools and some very important safety rules.
Tools
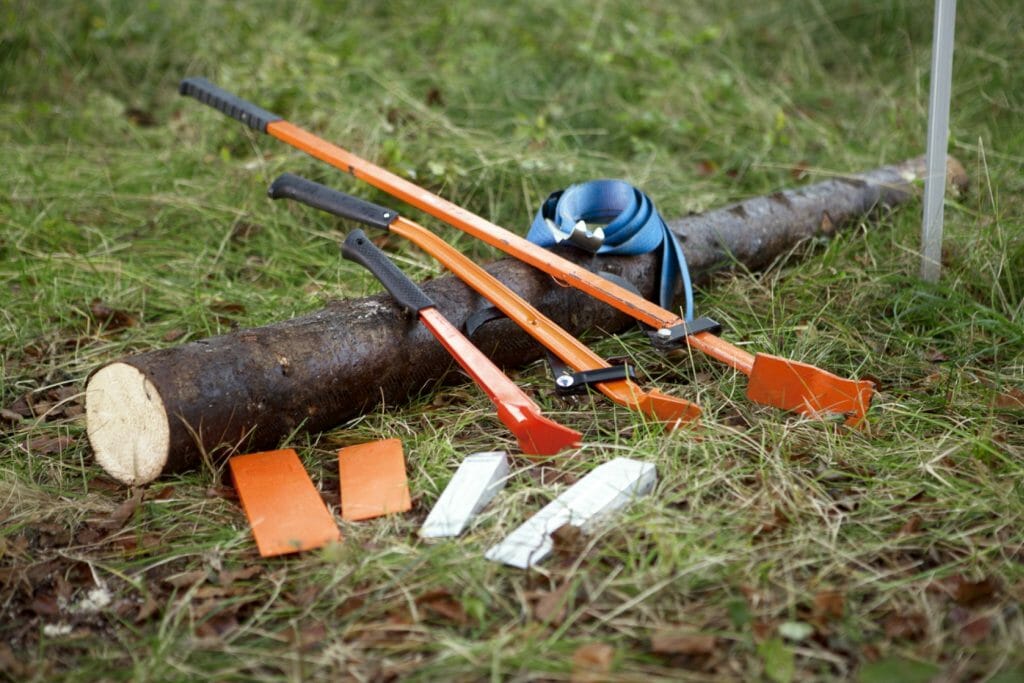
These are tools that will come in handy when removing a hung-up tree:
• Turning strap
• Turning hook. Often comes with the breaking bar.
• Winch (advanced, not covered in this topic)
• Forwarders or tractors fitted with grapple loader or winch (advanced, not covered in this topic)
For more info about forestry tools, see the topic Useful tools and accessories.
Safety first!
Working with or close to hung-up trees can be very dangerous. Never leave a trapped tree unmarked. Mark the area with highly visible marking tape if you must leave the area to get other tools or assistance. Follow these rules and make sure to never put yourself or any other person in danger:
Method
Rolling the tree method
Slightly leaning hang-ups are usually easy to roll down. Use the turning hook or turning strap if you think that the tree is not too stuck. Here’s how to do it.
1. Asses the tree
2. Adjust the hinge
3. Roll down the tree
1. Asses the tree

Assess the tree to decide in which way the tree can be rolled down.
2. Adjust the hinge

You need to adjust the hinge to make is possible to roll down the tree. Start with sawing off the middle of the hinge so that two corners are saved. Then cut off the corner on the opposite side from the direction in which you intend to roll down the tree. Cut this corner with repeated saw cuts diagonally from above. Make sure to leave the corner on the same side that you intend to roll down the tree.
3. Roll down the tree

Take the turning hook (or use the turning strap to attach a branch as a lever) and roll the tree away from you. Lift straight with a straight back and knees bent. If the tree is large or has hung really tightly, you can increase the rolling force by using the turning hook or turning strap with a longer piece from a thin tree.
Method
Step down method
Severely leaning hang-ups can be difficult to roll down, and must be levered or pulled backward. The method is based on removing the tree from the stump or the place where the tree is stuck with the butt end in the ground. The trunk should have a good sliding surface and fall off cleanly.
Be aware that the trunk could sever too early – never stand in the direction of movement or under the trunk.
It is important that the two saw cuts are not made too high up on the trunk as it could “fold down” at the breaking point. If the tree is too tightly hung, you should use a tractor, winch or other machine.
Here’s how to perform the step down method.
1. Create a slider bed
2. Make the backside cut
3. Place a wedge
4. Saw the front side cut
5. Knock the wedge
6. The hung-up tree slides backwards
7. If needed, lever with a pole
8. If needed, repeat the process
1. Create a slider bed

Lay branches and poles on the ground in front of the trunk to form a surface /slider bed.
2. Make the backside cut
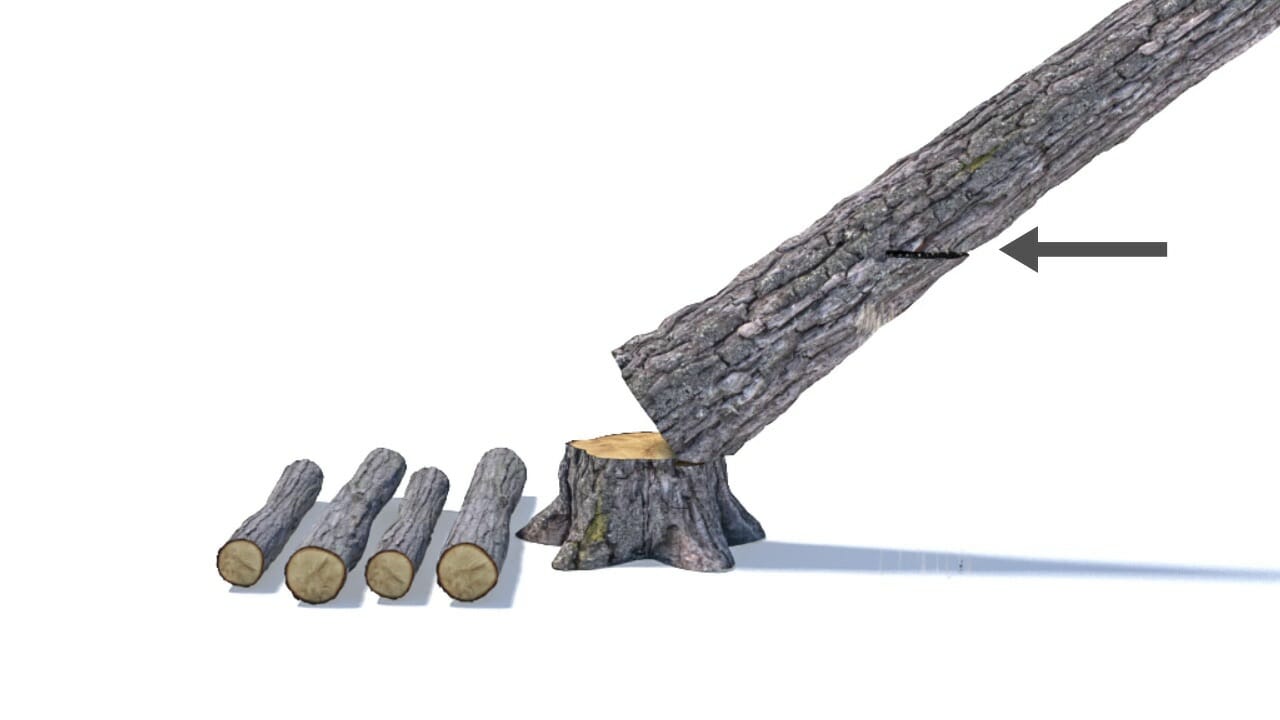
Cut into about half the diameter of the rear of the trunk. Continue cutting from the other side if the guide bar is shorter than the tree diameter.
3. Place a wedge

Insert a wedge to prevent the backside cut from pinching.
4. Saw the front side cut

Saw the next cut from the front, parallel to the previous cut, but 3-5 cm below. Cut into about half the diameter of the trunk. Taper the front of the trunk.
5. Knock the wedge

Knock in the wedge until the wood fibres split between the two cuts. Stay alert – the trunk usually slides off the stump at the same time.
6. The hung-up tree slides backwards

Performed correctly this is the result of the step down method. The tree splits from the stump, slides backwards on the sliding surface, releases from the tree it got hung-up on and falls to the ground.
7. If needed, lever with a pole

If the hung-up tree did not come loose by knocking in the wedge: Lever the tree with a 2 – 3 m long rod/pole in the direction of movement until the tree breaks loose and slide down.
8. If needed, repeat the process
If the tree does not come loose, repeat the process from step 1. Remember: safety first. If in doubt, seek help from a hung-tree expert.